PHPStorm + Docker + WSL2 + XDebug配置指南
动态调试还是必不可少的
🐳 在 Windows + WSL2 + Docker(host 模式)环境中使用 PhpStorm 调试 PHP(Xdebug3)完整指南
在CTF比赛中,如果遇到下发复杂source文件的php题目时,没有动态调试就会显得手忙脚乱。又因为每个环境都有自己独特的配置,Docker也是必不可少的。 这就如果本机是Windows,每次为题目配置环境显然不太可能,本文考虑一种解决方法:Windows PHPStorm ⟷ WSL2 ⟷ Docker(WSL backend)⟷ 容器
环境组合最容易踩坑的就是网络: Windows ⟷ WSL2 ⟷ Docker(WSL backend)⟷ 容器 本文提供一个稳、简单、可复现的通用方案,避免各种 IP、防火墙、host-gateway、WSL NAT 的复杂问题。
最终方案核心思想:
让容器使用 WSL 的 host 网络,然后把 Xdebug 指向 127.0.0.1(即 WSL → Windows 自动转发 PhpStorm)
以[RCTF 2025]的Web题Photograph为例。
1、Docker文件配置
首先打开项目: 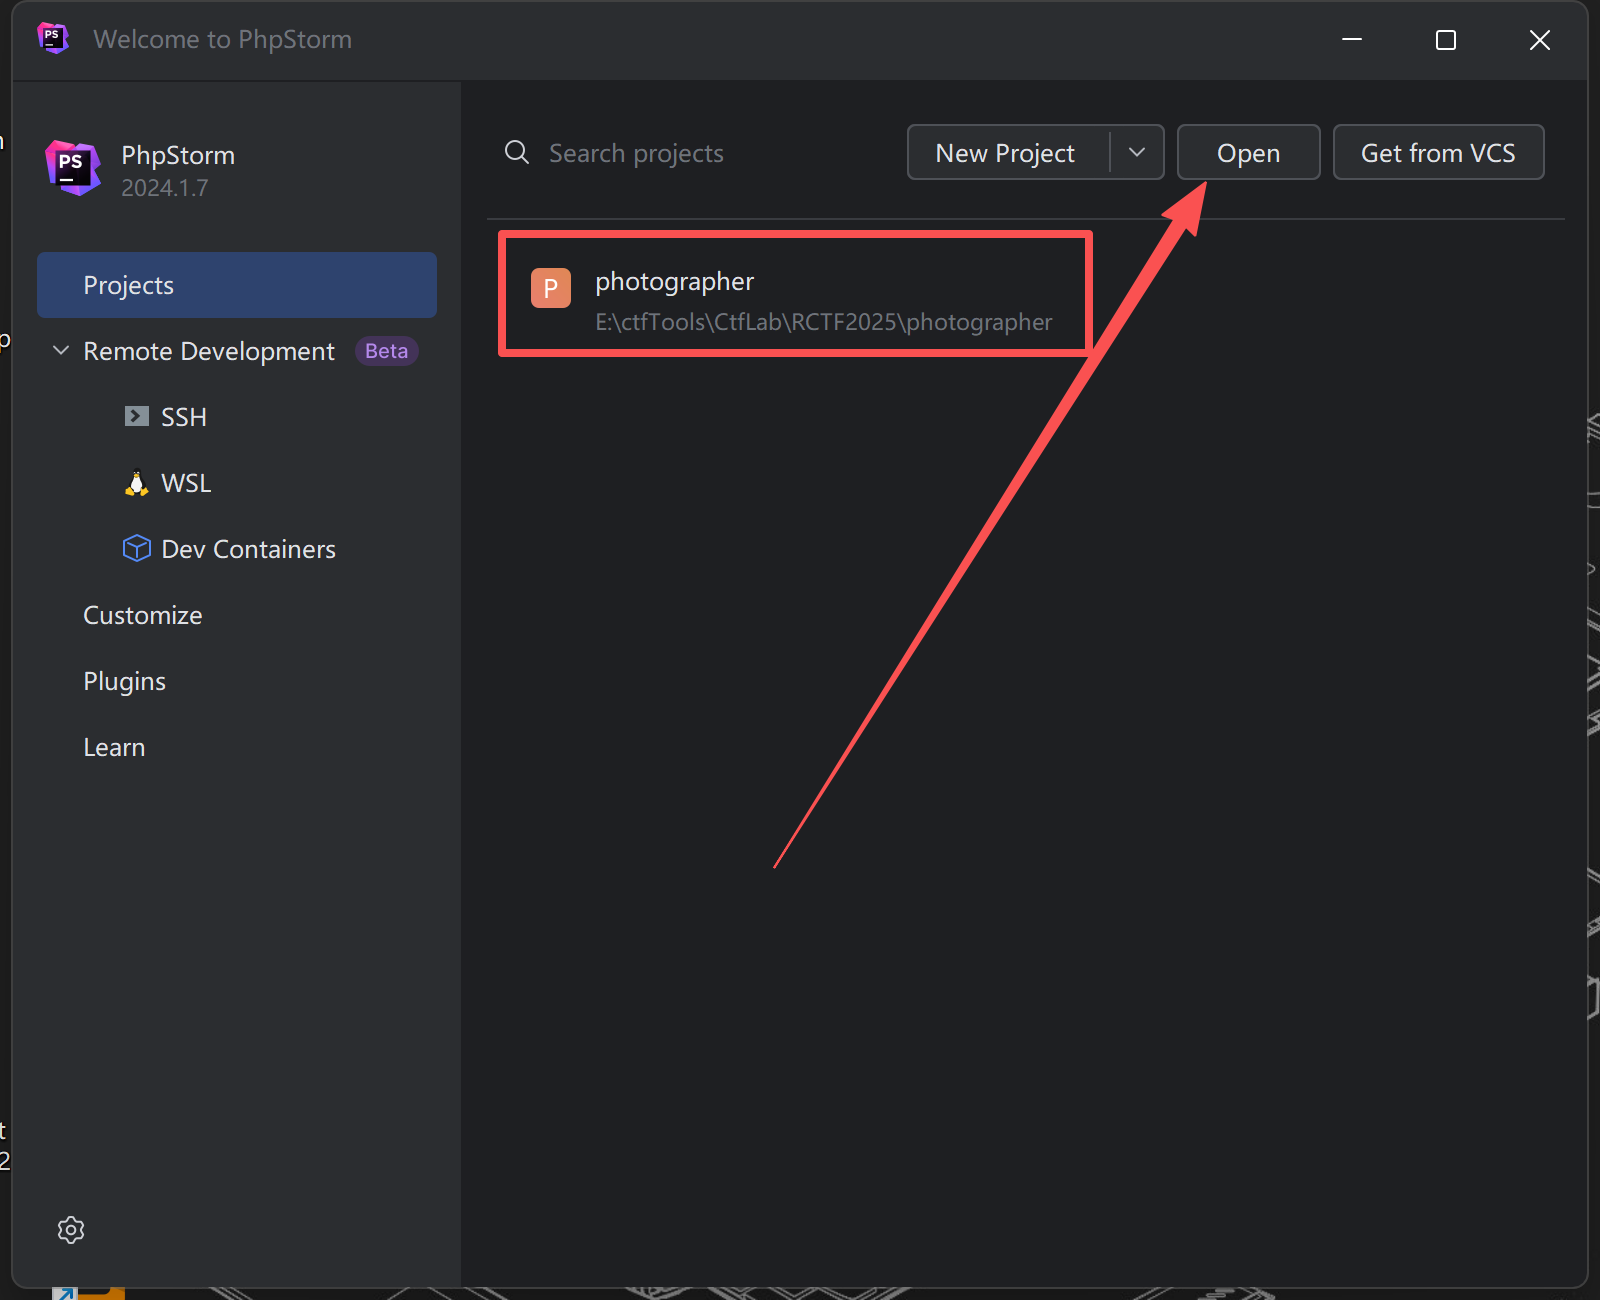
核心修改点是docker-compose.yml:
1
2
3
4
5
6
7
8
9
10
11
12
13
14
15
16
17
18
19
20
21
22
23
24
25
26
27
28
version: '3.8'
#
#services:
#  photographer:
#    build:
#      context: .
#      dockerfile: Dockerfile
#    container_name: photographer
#    ports:
#      - "9010:80"
#    environment:
#      - FLAG=RCTF{test_flag}
#    extra_hosts:
#      - "host.docker.internal:host-gateway"
#    volumes:
#      - .:/var/www/html
services:
  photographer:
    build:
      context: .
      dockerfile: Dockerfile
    container_name: photographer
    network_mode: "host"      # 关键:使用 host 网络
    environment:
      - FLAG=RCTF{test_flag}
    volumes:
      - .:/var/www/html
之后在当前目录新建php-xdebug.ini:
1
2
3
4
5
6
7
8
9
10
[xdebug]
; 只要 debug 模式就够了
xdebug.mode=debug
; 每次请求都尝试连 IDE
xdebug.start_with_request=yes

; 让容器知道 PhpStorm 在哪儿:
; 在 WSL + Docker Desktop 环境下,用 host.docker.internal 最稳妥
xdebug.client_host=127.0.0.1
xdebug.client_port=9003
然后修改Dockerfile以确保XDebug被正确地安装到环境中:
1
2
3
4
5
6
7
8
9
10
11
12
13
14
15
16
17
18
19
20
21
22
23
24
25
26
27
28
29
30
31
32
33
34
FROM php:8.4-apache

RUN apt-get update && apt-get install -y \
    libsqlite3-dev \
    libfreetype6-dev \
    libjpeg62-turbo-dev \
    libpng-dev \
    && docker-php-ext-configure gd --with-freetype --with-jpeg \
    && docker-php-ext-install -j$(nproc) gd exif pdo pdo_sqlite \
    && a2enmod rewrite \
    # ===新增===
    && pecl install xdebug \
    && docker-php-ext-enable xdebug \
    # =========
    && apt-get clean \
    && rm -rf /var/lib/apt/lists/*

# ===新增===
COPY php-xdebug.ini /usr/local/etc/php/conf.d/php-xdebug.ini
# =========

WORKDIR /var/www/html

COPY . /var/www/html/

RUN mv 000-default.conf /etc/apache2/sites-available/000-default.conf \
    && chmod -R 755 /var/www/html \
    && chmod -R 777 /var/www/html/public/uploads \
    && chmod 777 /var/www/html/database \
    && chmod 666 /var/www/html/database/photographer.db 2>/dev/null

EXPOSE 80
2、PHPStorm文件配置
接下来进入设置: 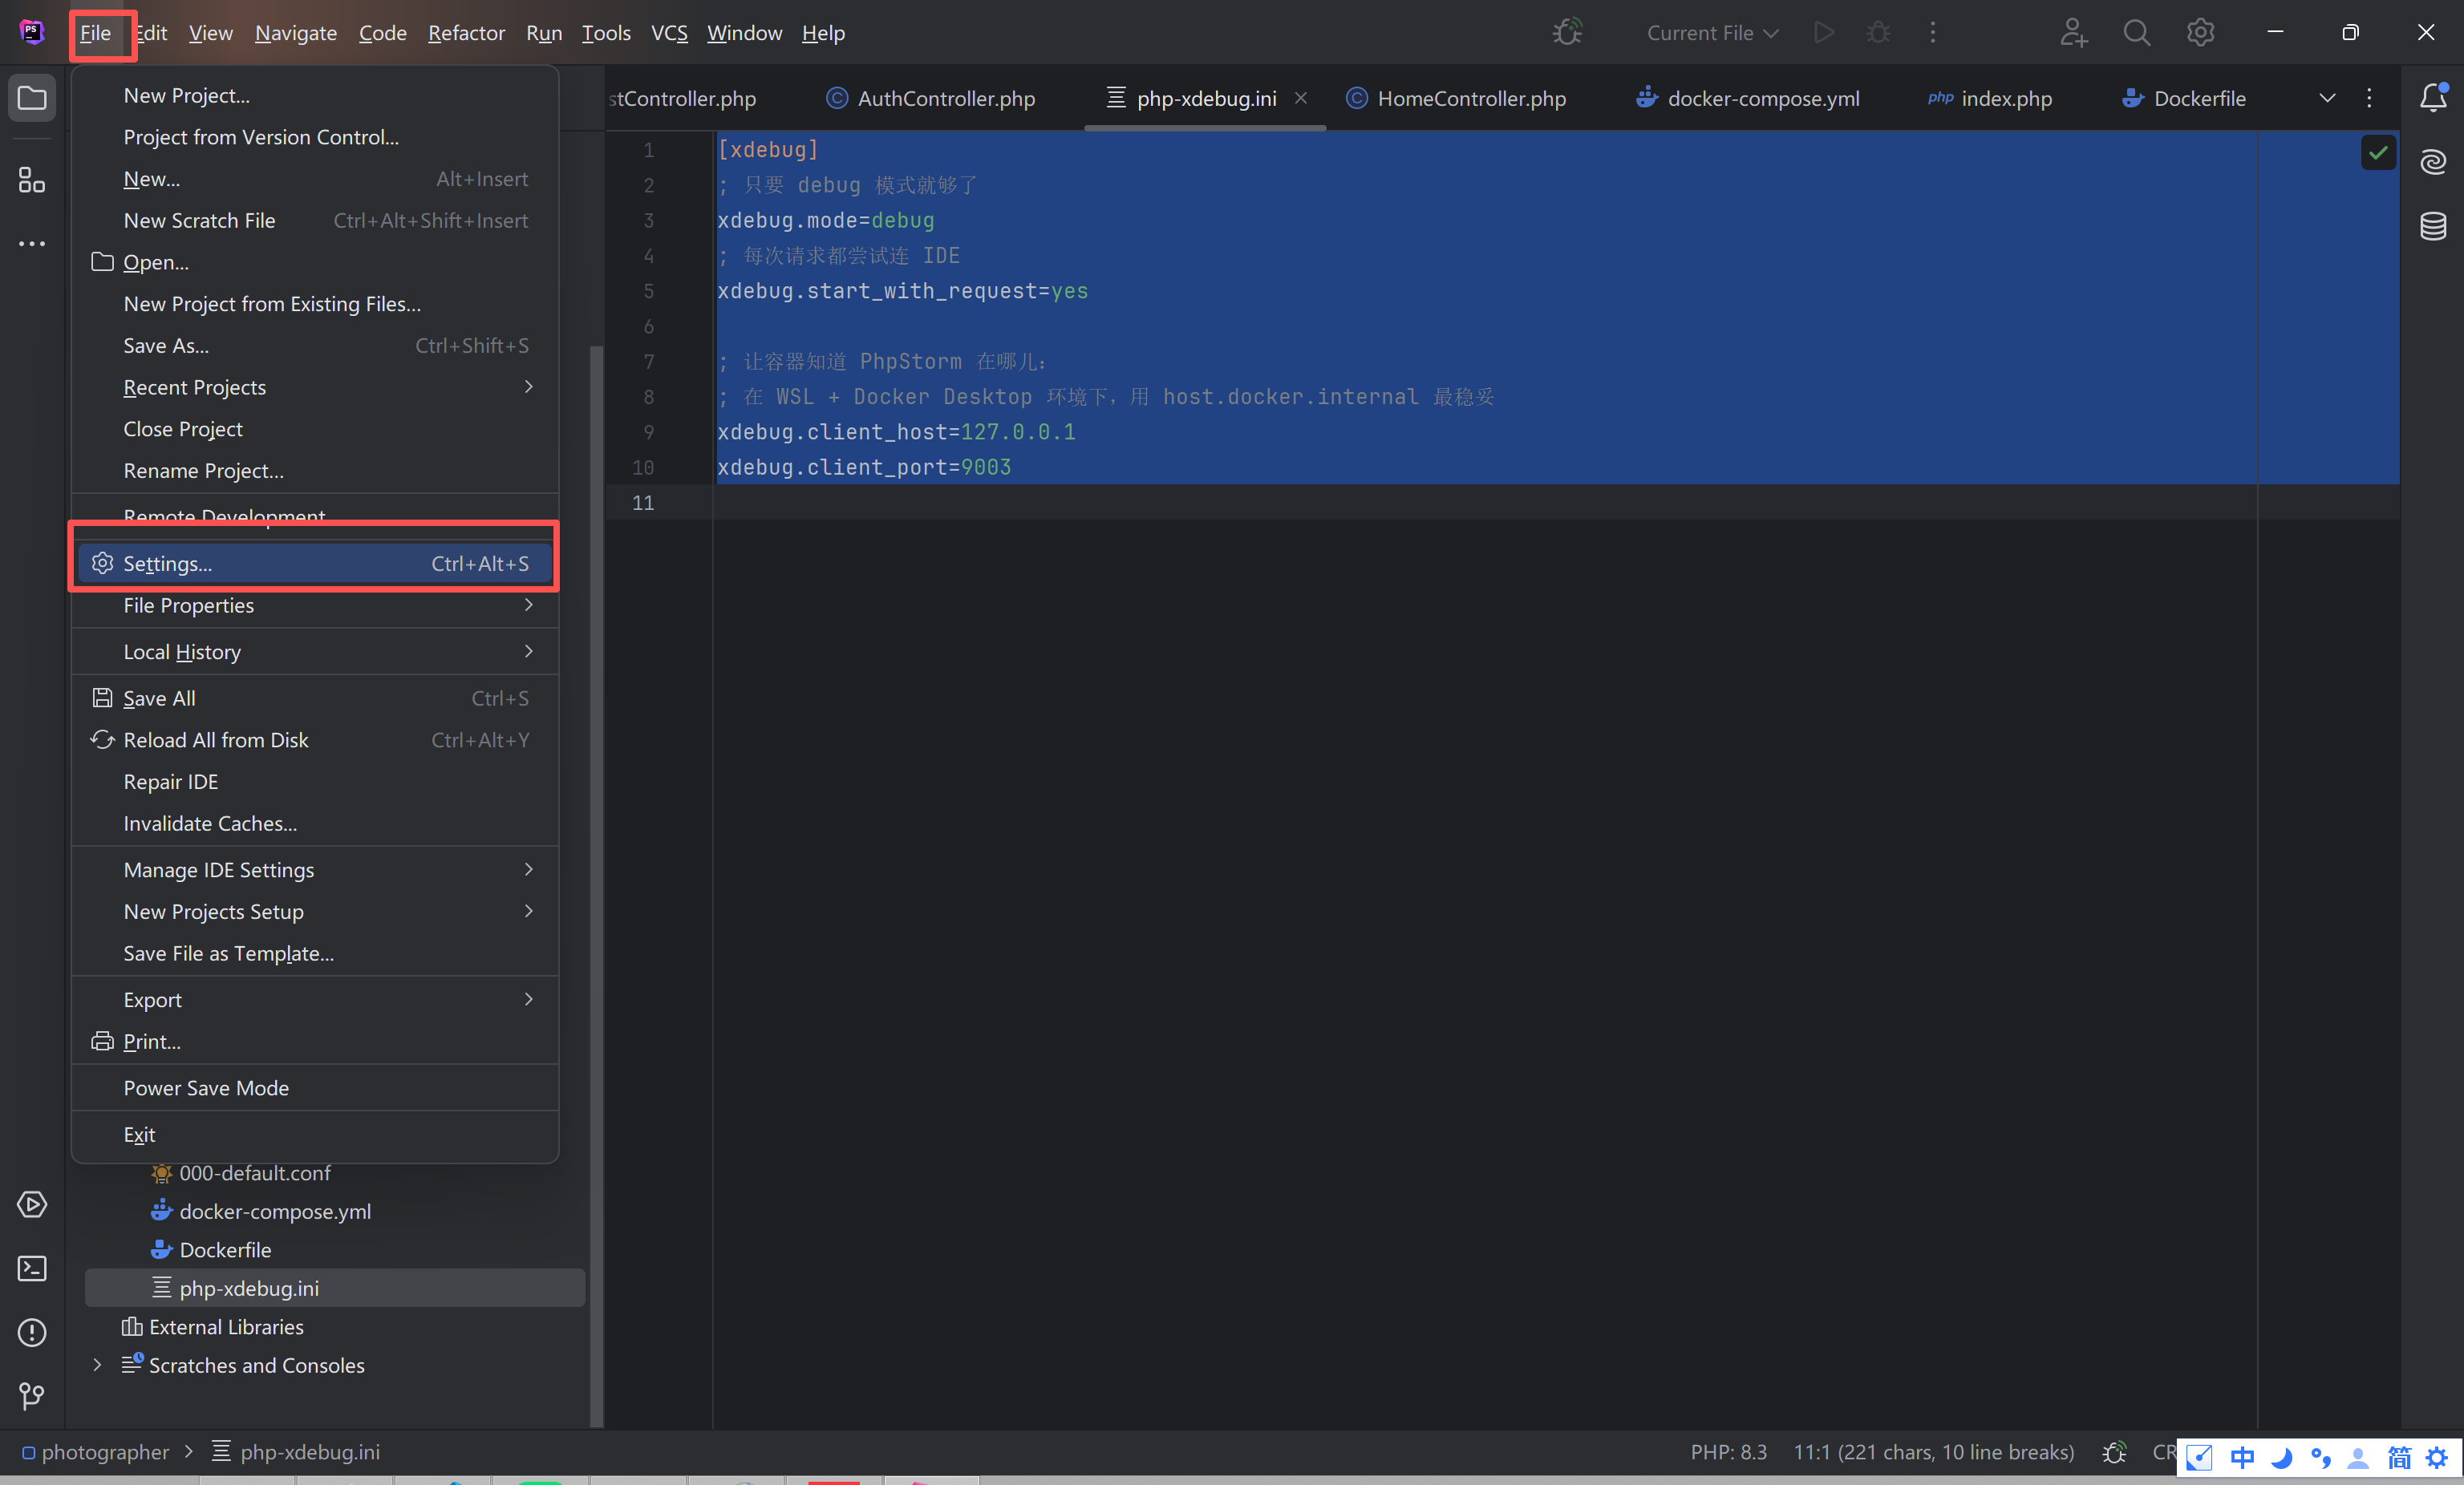
首先设置docker环境,在Build, Execution, Deployment > Docker,设置为WSL: 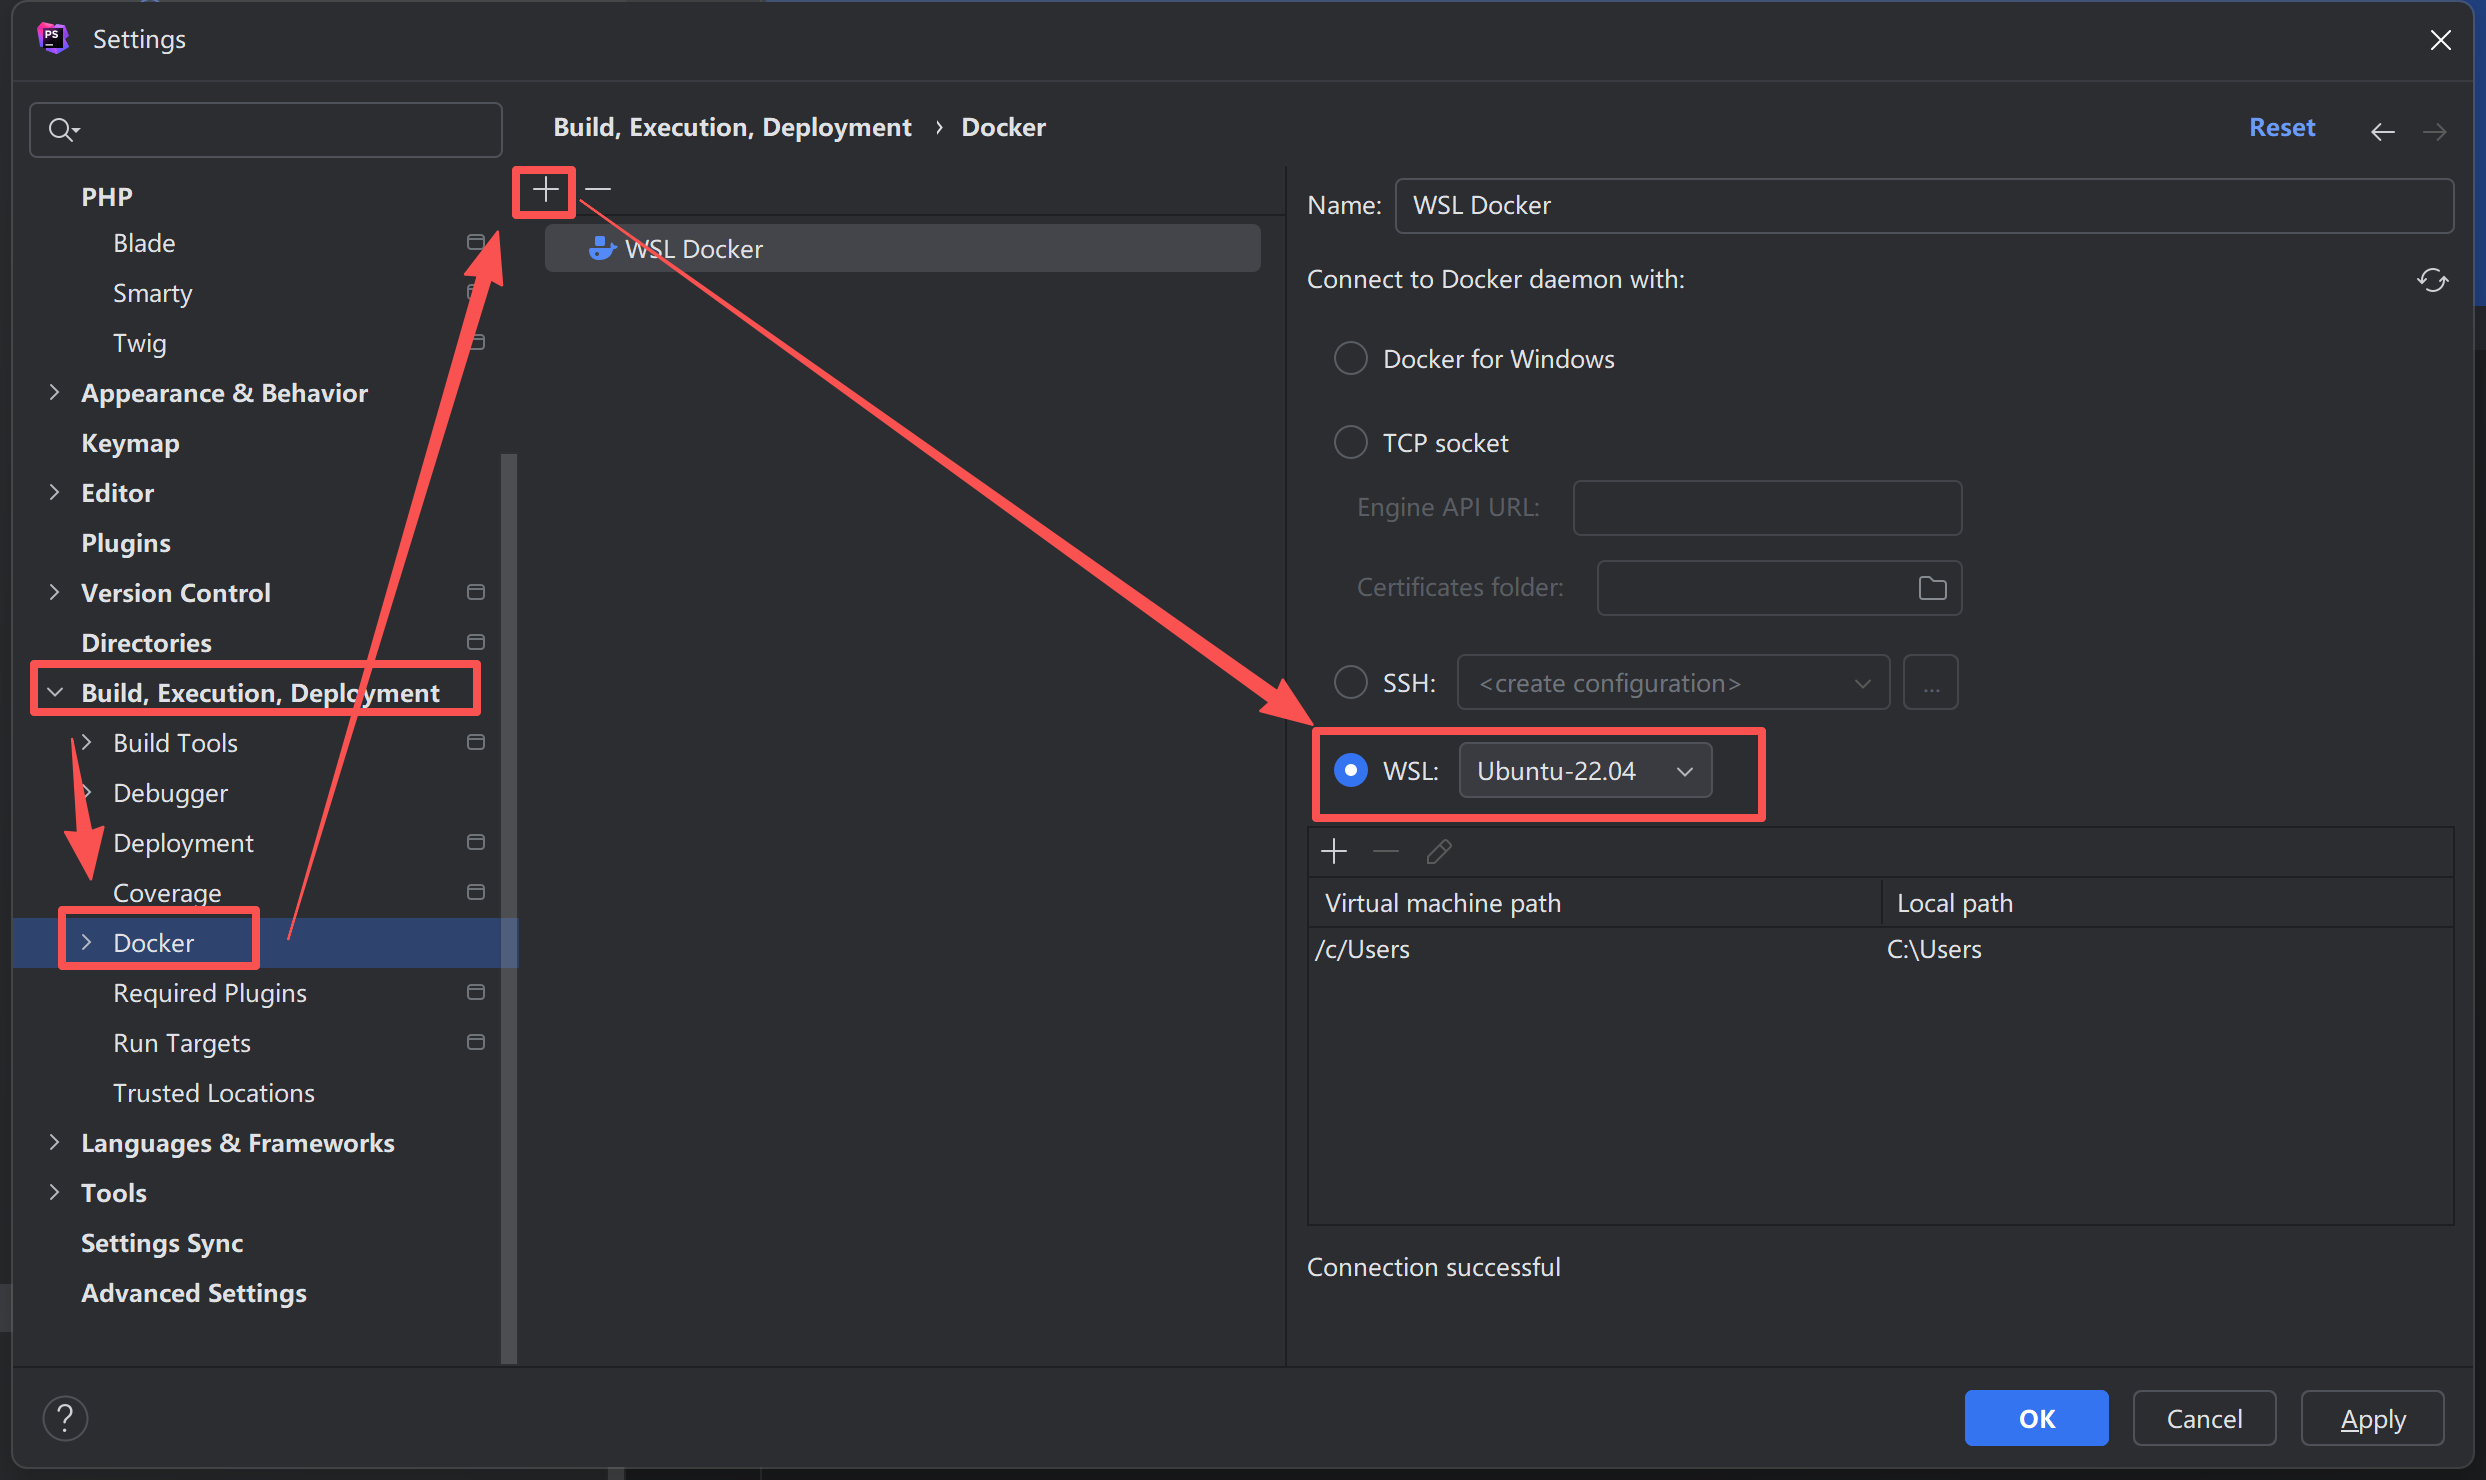
然后在PHP > Server中设置: 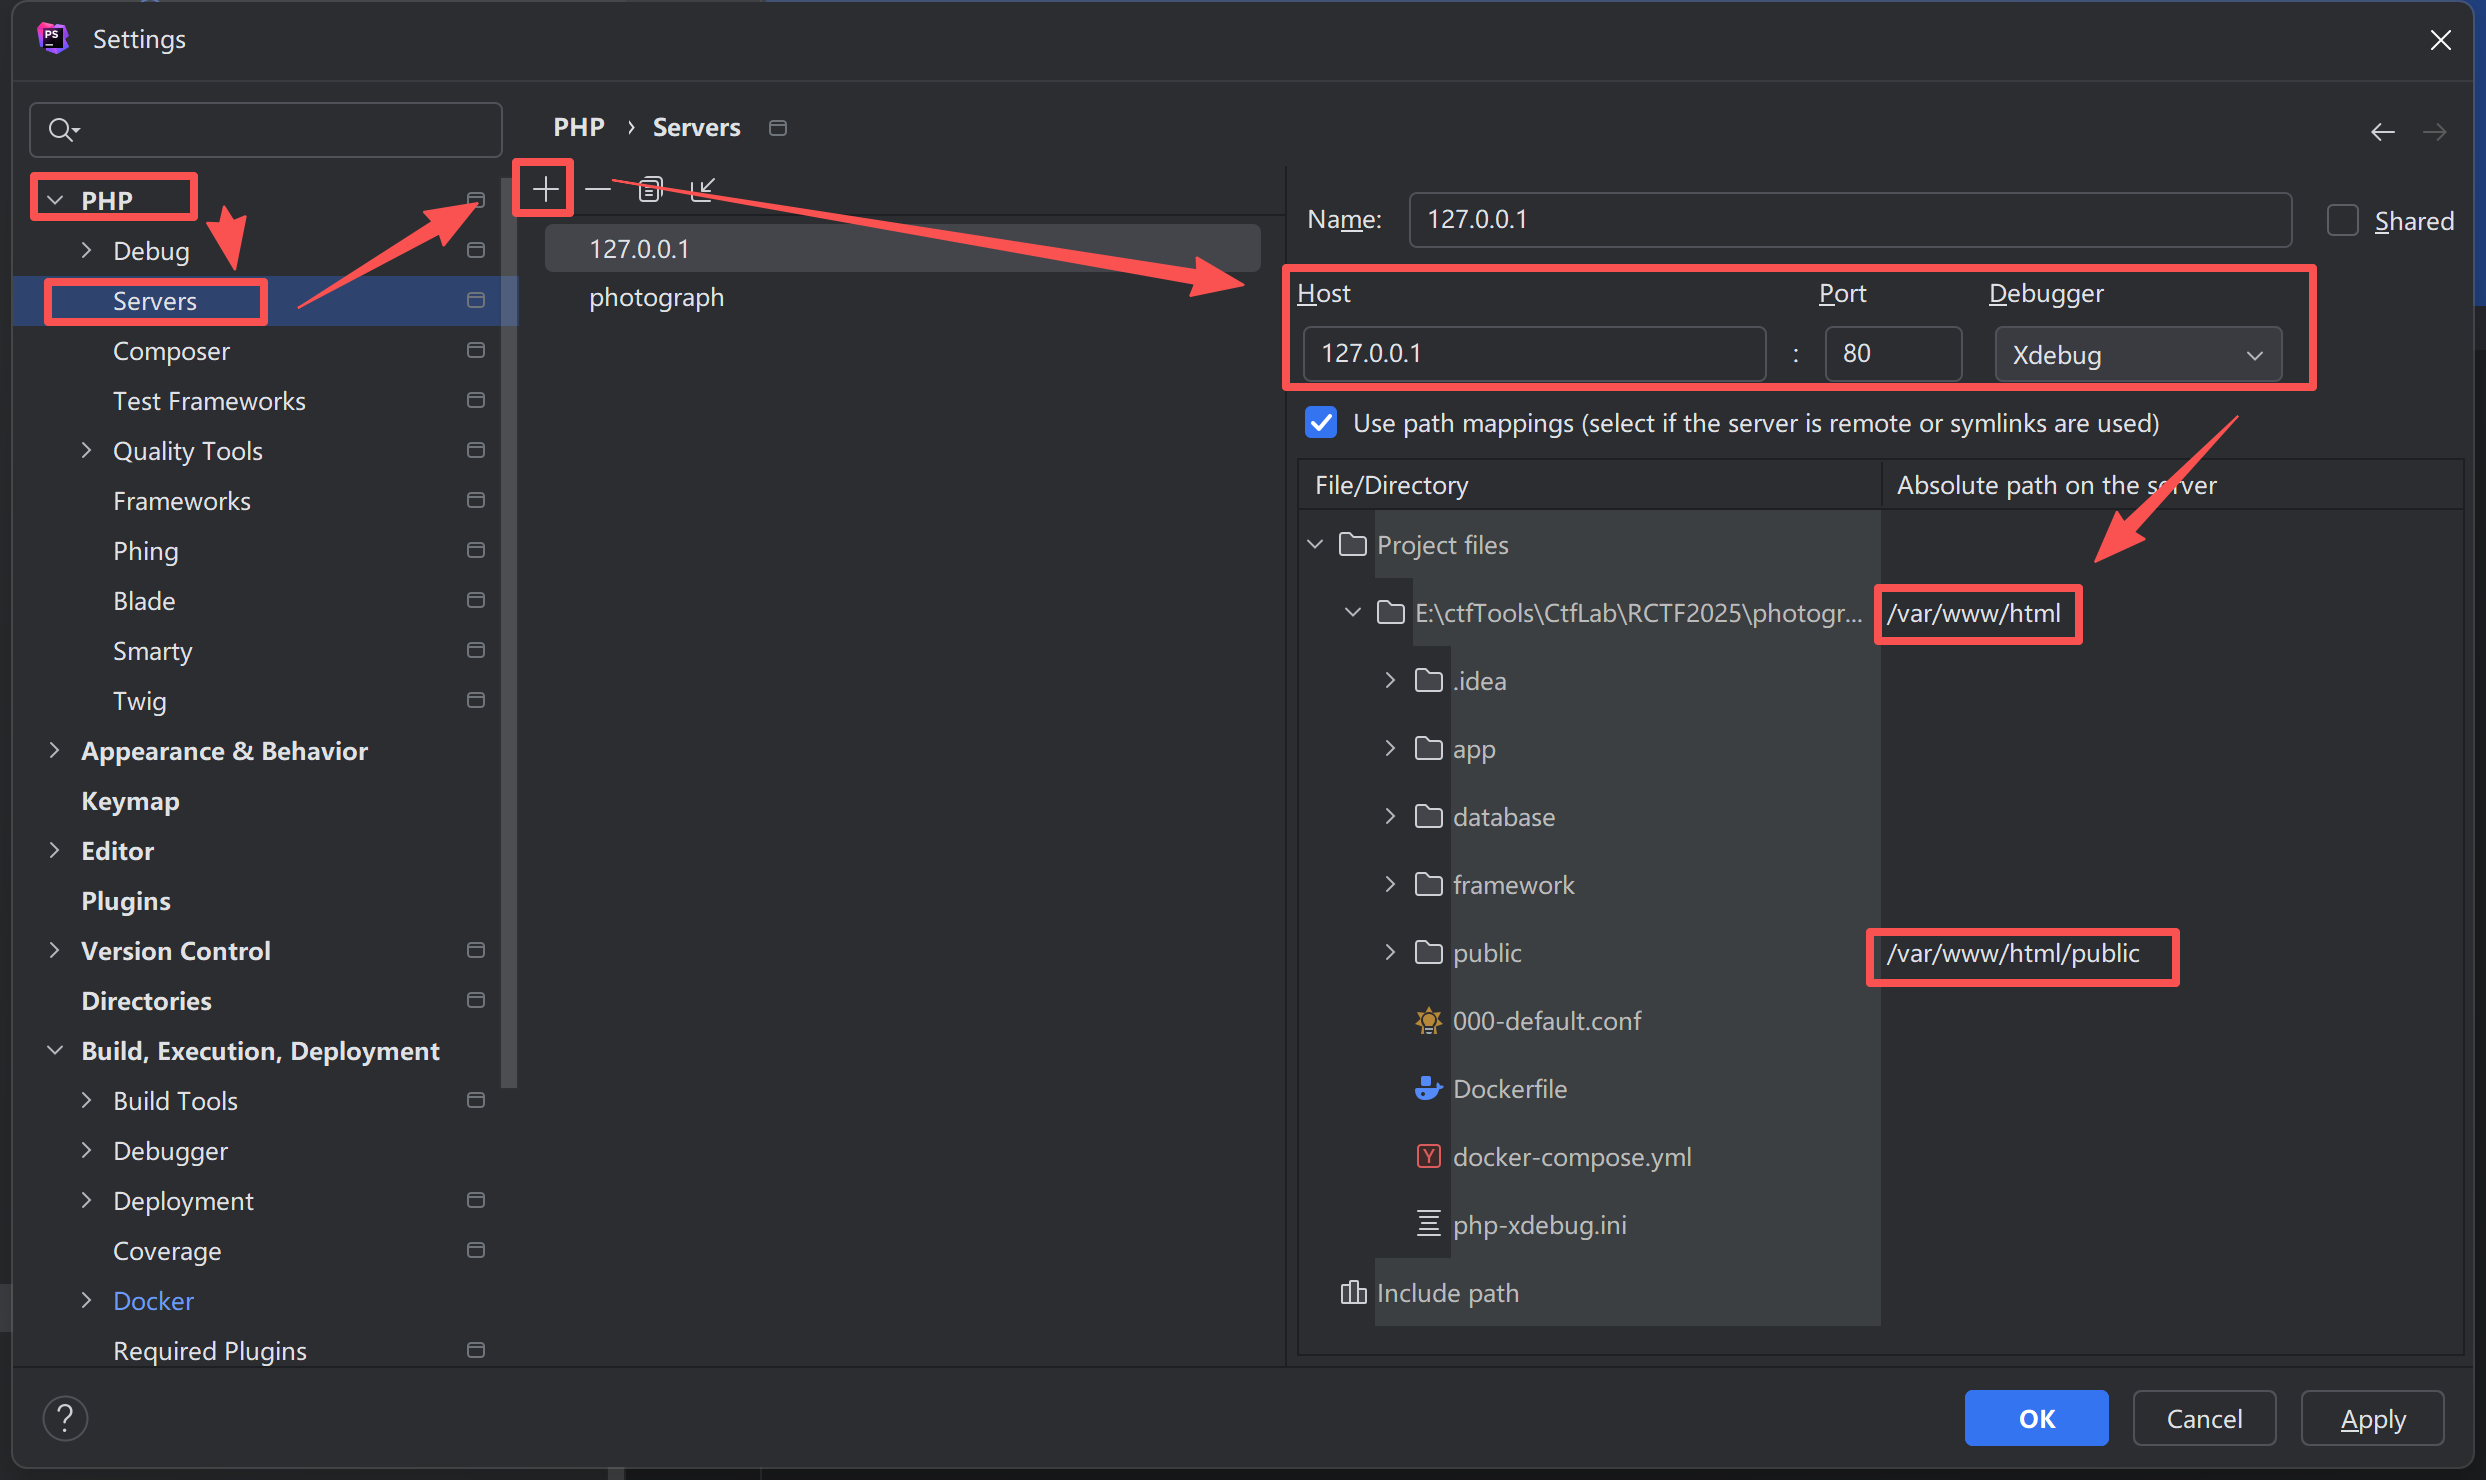
然后PHP > Debug中取消勾选Ignore external connections through unregistered servers: 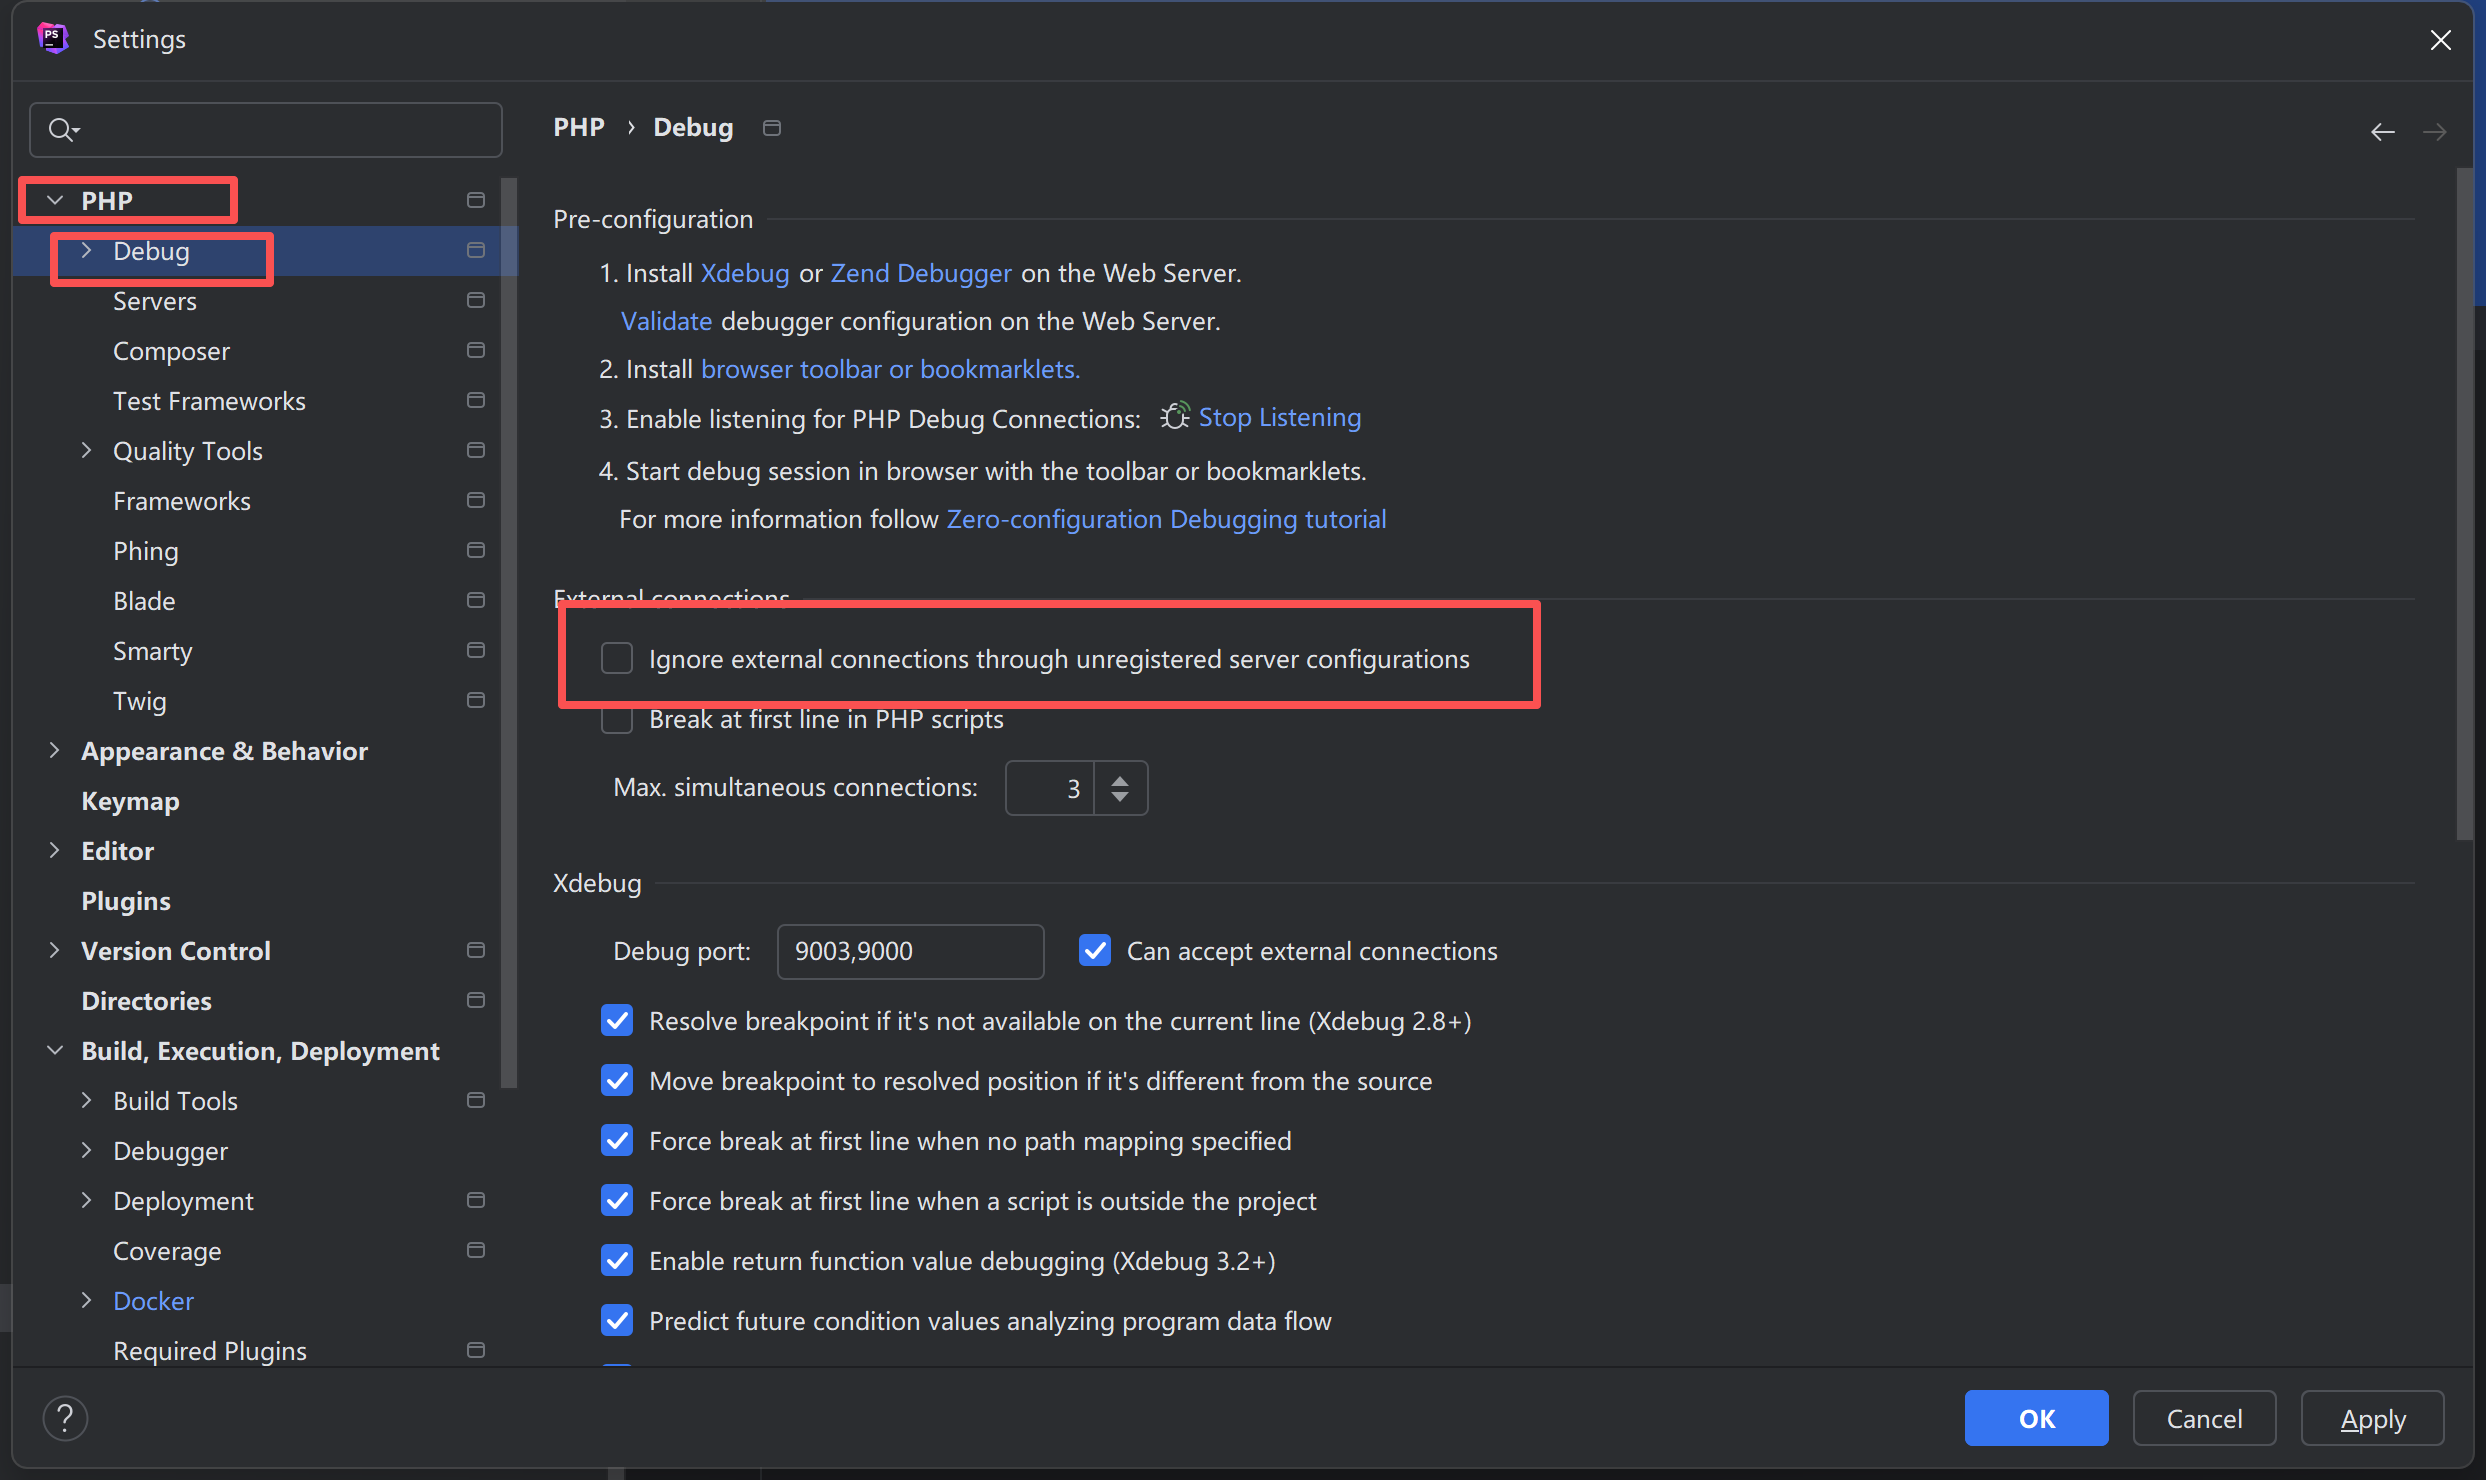
最后在PHP中设置CLI: 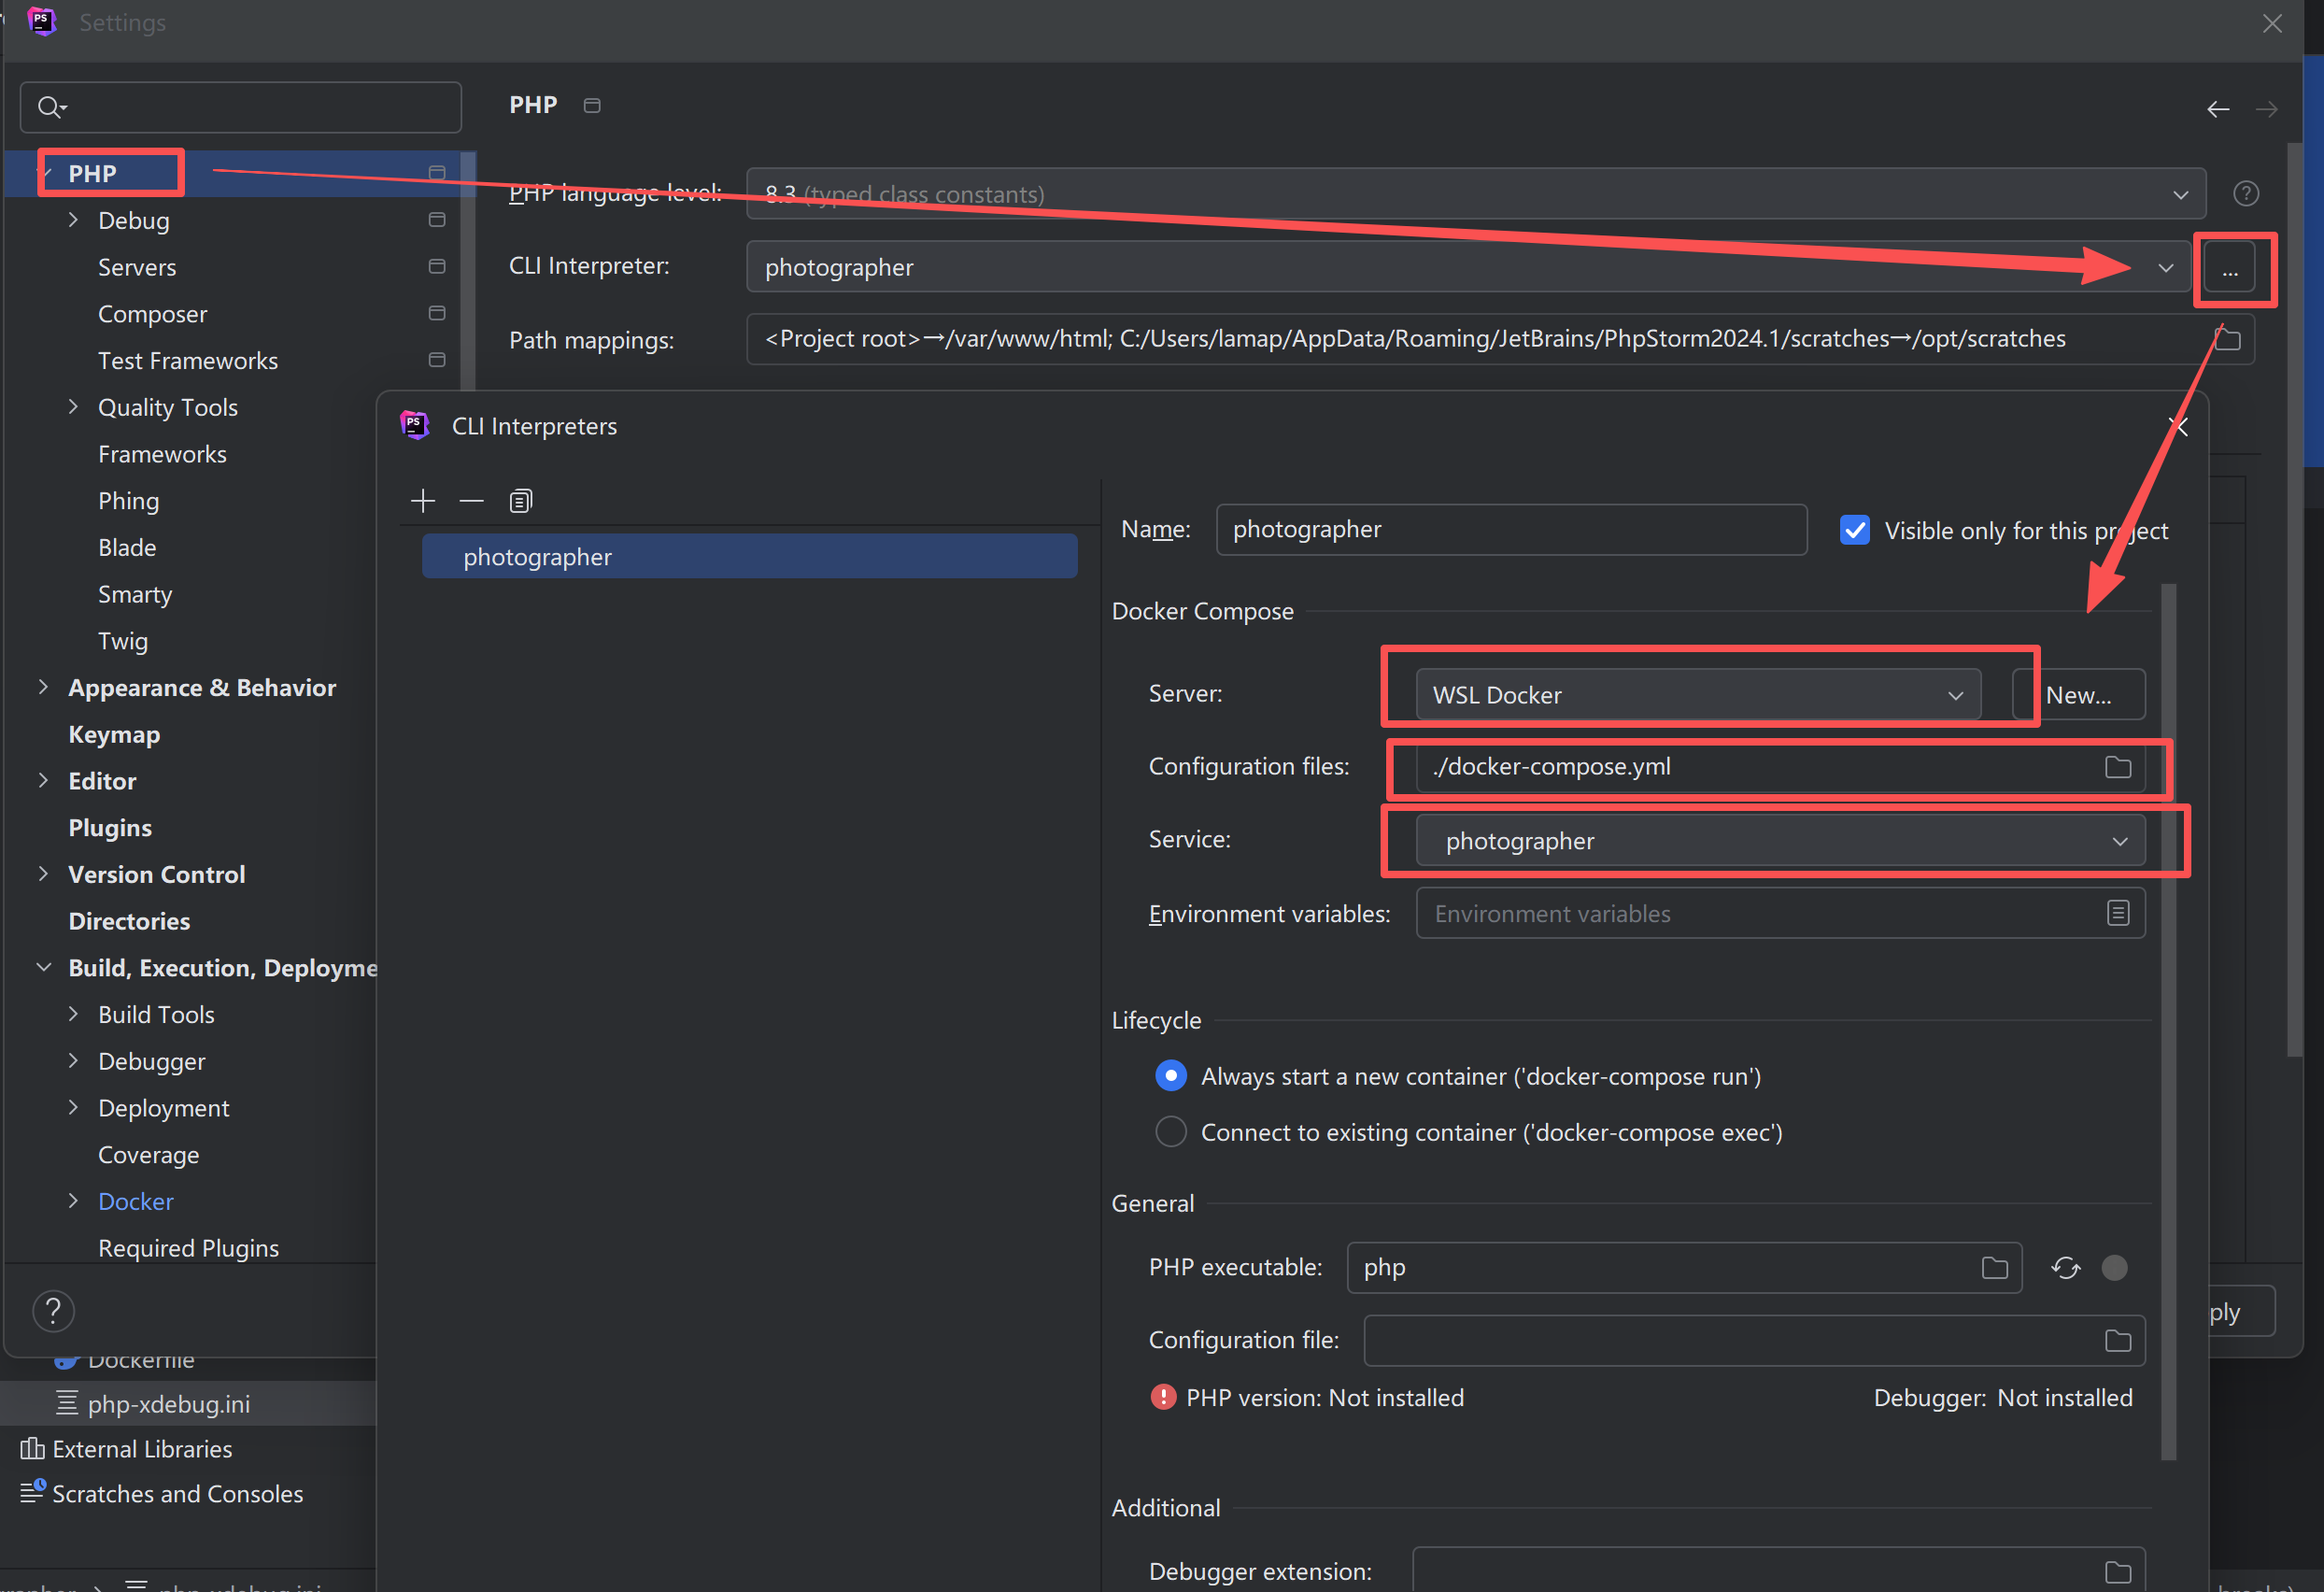
设置好后开启监听即可: 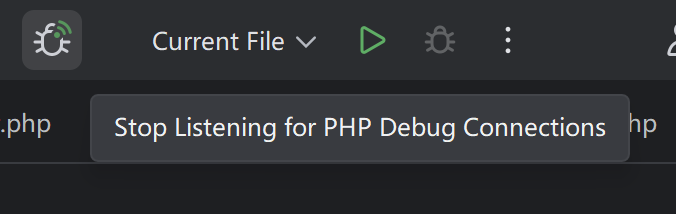
3、WSL启动环境
首先
1
2
3
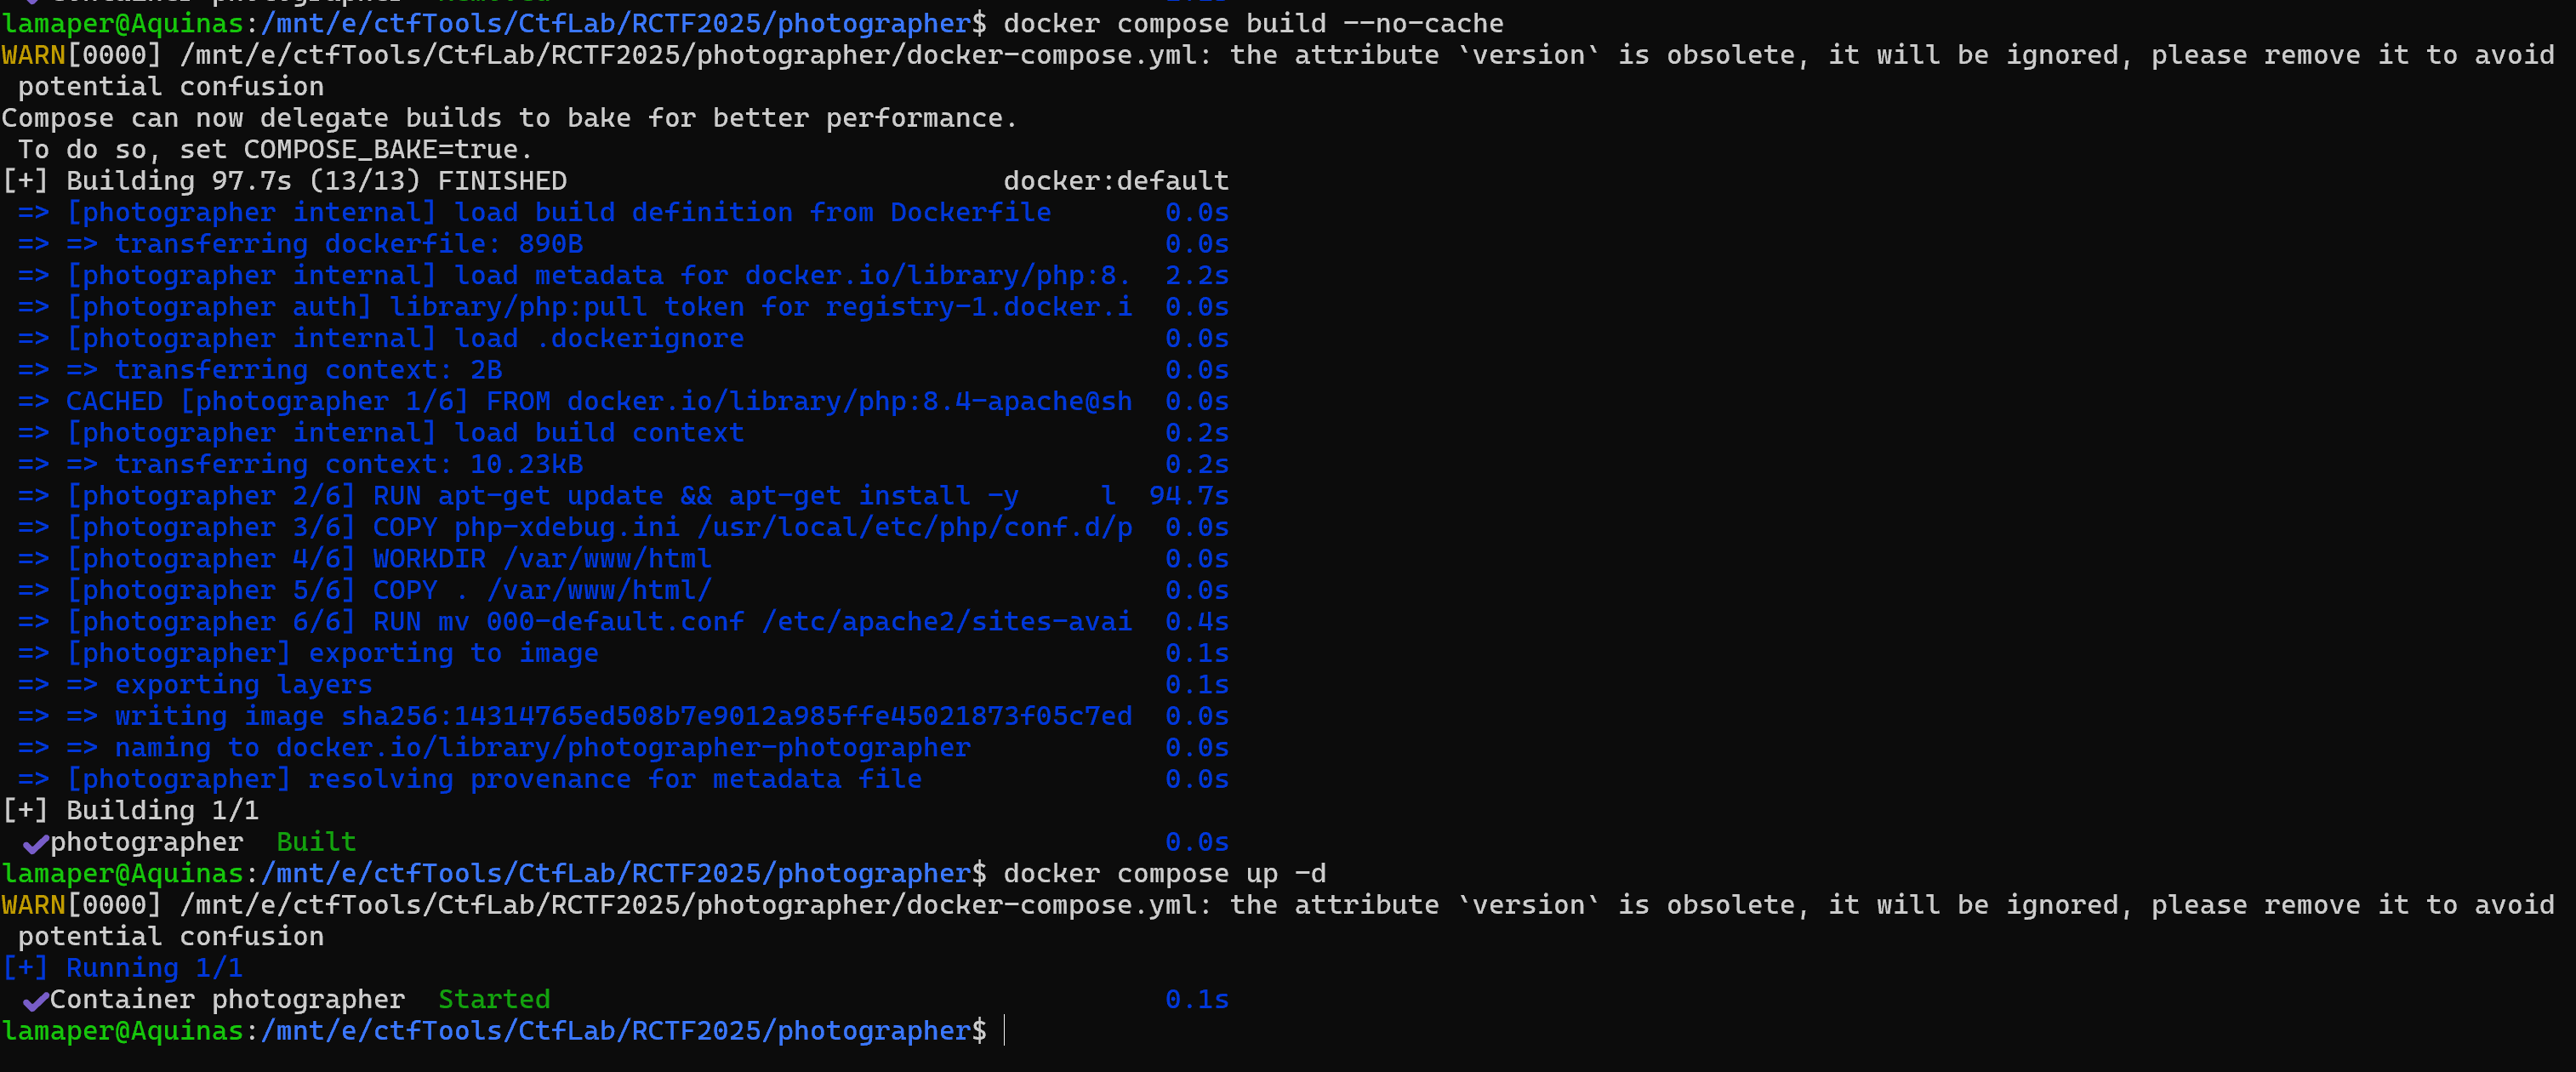
docker compose build --no-cache
docker compose up -d
启动后进入容器查看:
1
2
3
4
5
6
lamaper@Aquinas:/mnt/e/ctfTools/CtfLab/RCTF2025/photographer$ docker exec -it photographer bash
root@Aquinas:/var/www/html# php -i | grep xdebug.client_
xdebug.client_discovery_header => HTTP_X_FORWARDED_FOR,REMOTE_ADDR => HTTP_X_FORWARDED_FOR,REMOTE_ADDR
xdebug.client_host => 127.0.0.1 => 127.0.0.1
xdebug.client_port => 9003 => 9003
root@Aquinas:/var/www/html#
顺利的话,我们就可以在PHPStorm中找到: 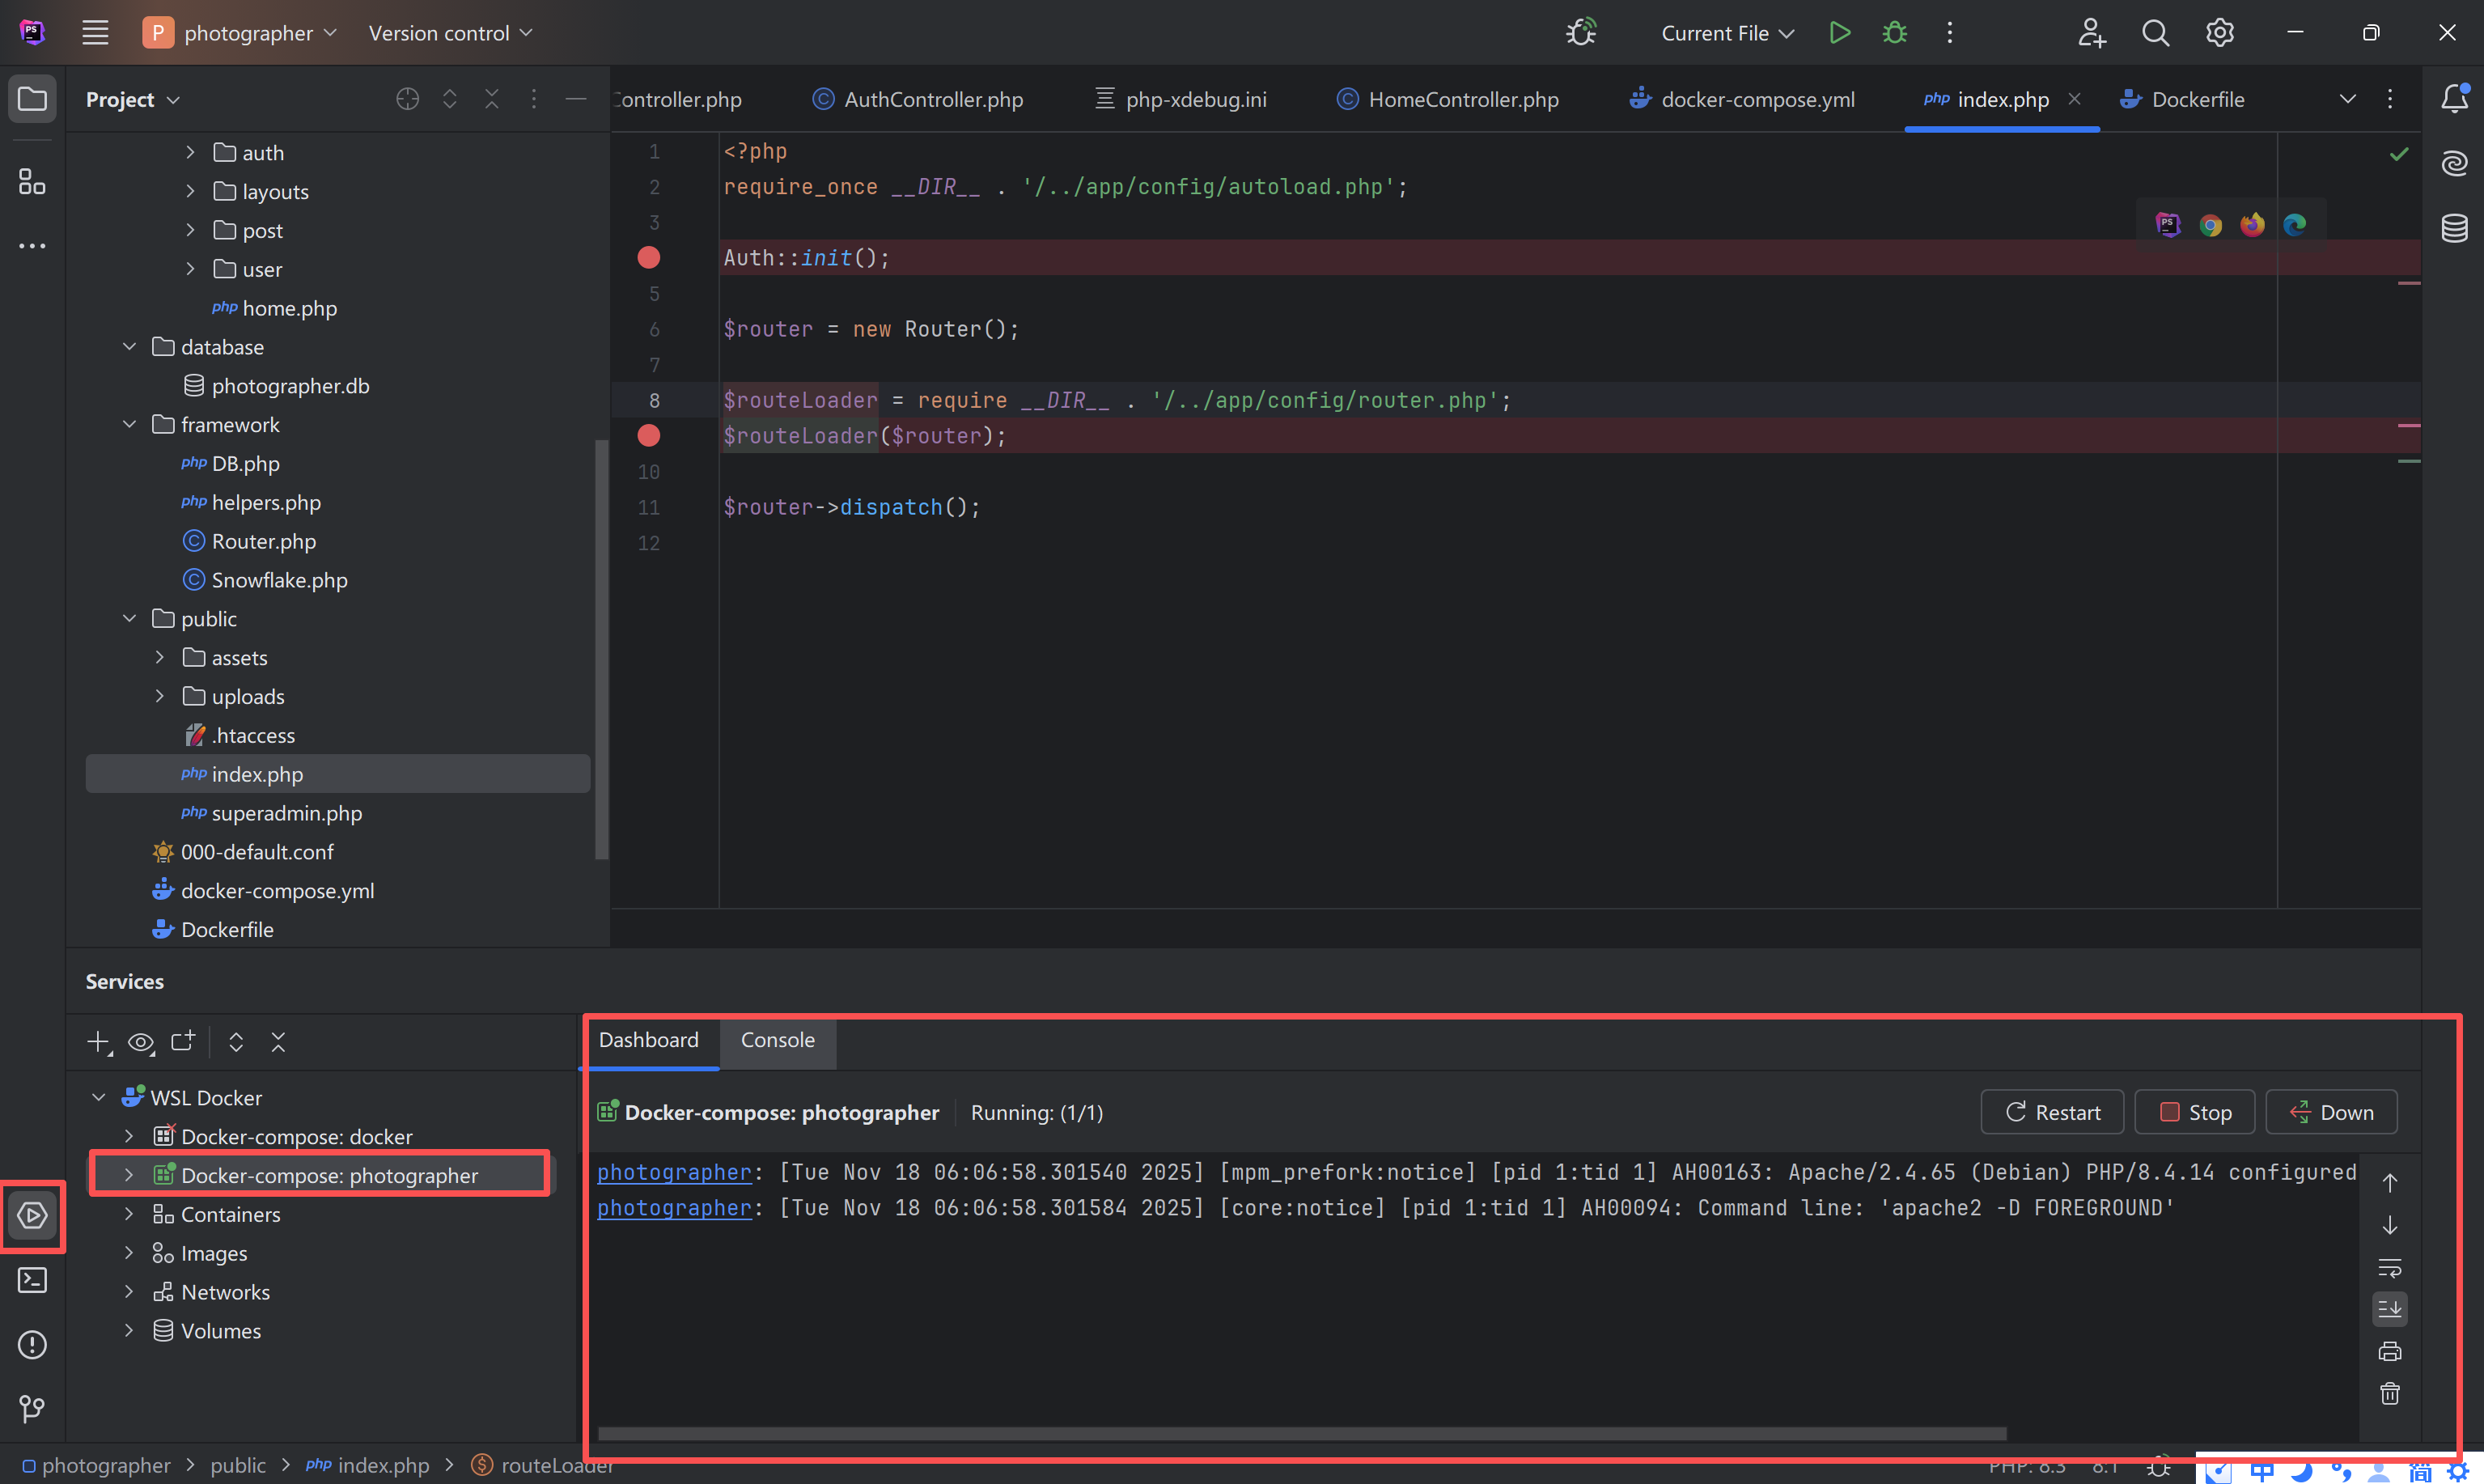
打上断点之后,在浏览器访问http://127.0.0.1 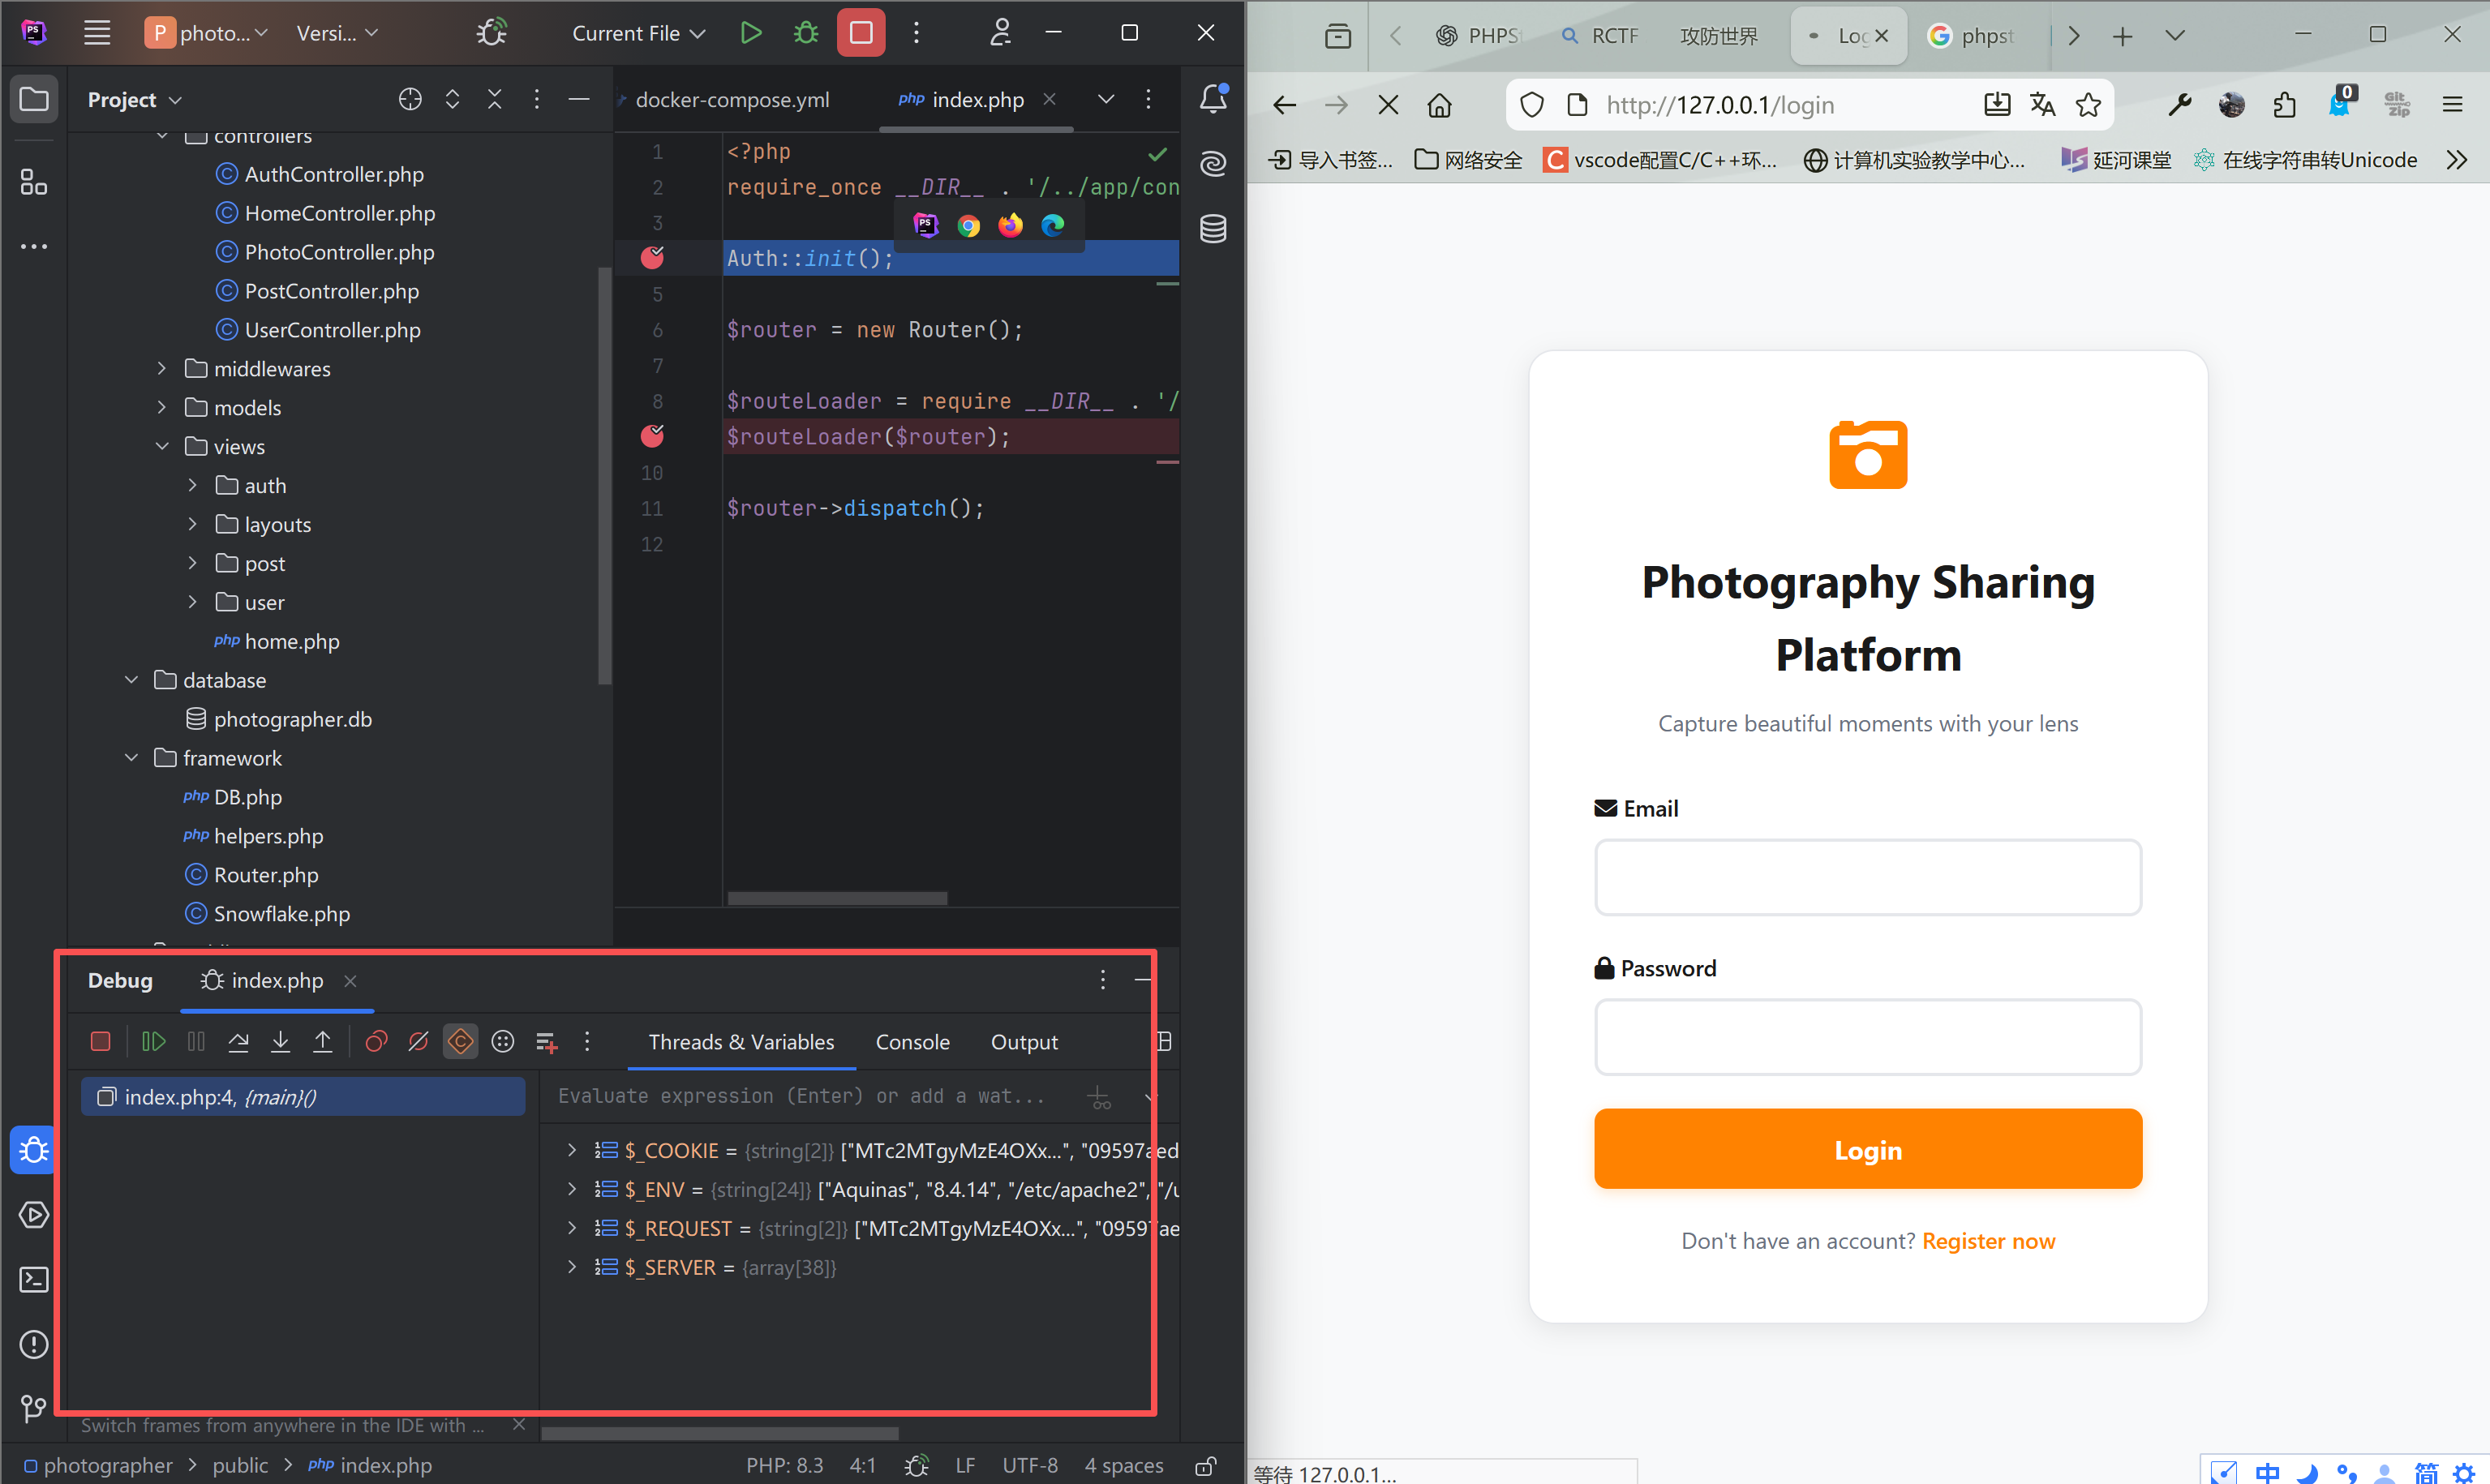 可以看到已经可以进行调试